11 Jan 2016
One piece of advice I wish I had been given when I started my first company was how to structure conventions in my
codebases. It may not seem like a big deal when you’re hacking your first prototypes in a garage, but a small
amount of discipline can save you an enormous amount of time in the long run. Conventions and best practices keep
code malleable while allowing you to focus on solving problems instead of arguing about each small technical
detail. Starting a company is hard and your code must allow you to keep up with the changing demands of your
industry without getting into a state where you have to throw everything out when requirements change.
In this post I’ll show you conventions for a basic
RESTful
CRUD API using
Play Framework and I’ll try to keep the conventions abstract so they could be used
with any framework and language. I’ve also open sourced an application at
jtescher/play-api as an example of what a fully tested and functional
app looks like in this style.
The CRUD API server
The CRUD API is the bread and butter of every startup’s products. If your problem can fit into the confines of this
simple architecture it will remain easy to make large changes quickly and with confidence. The availability of open
source JSON REST clients in basically all languages makes it extremely quick to develop and change applications. Many of
my convention recommendations are inspired by the Rails and Ember
conventions.
Routing Conventions
Standardized endpoints allow client applications to use simple open source REST clients like
RestKit or Ember
Data without having to implement custom adapters. Here are
a few conventions to keep things simple and clean.
- Use URL based API versioning. E.g.
/v1/posts.
- Use 5 standard endpoints with appropriate HTTP verbs:
- Use shallow nesting
/v1/posts/1/comments and /v1/comments/2 instead of /v1/posts/1/comments/2.
GET       /v1/posts        # => Index
POST      /v1/posts        # => Create
GET       /v1/posts/:id    # => Show
PUT       /v1/posts/:id    # => Update
DELETE    /v1/posts/:id    # => Destroy
Controller Contentions
Your controllers should be as simple as possible and free of business logic. They should primarily be for exposing your
application over HTTP and handling concerns like mapping application responses and errors to status codes. If you find a
lot of code building up in your controller layer, you might consider pulling it out into a library or finding an open
source solution that accomplishes the same task. If done correctly, all of your controllers should look very uniform and
very simple.
- Use pluralized resource name with
Controller suffix. E.g. PostsController.
- Use the
ControllerConventions
trait to abstract common controller code like model parsing.
- Move repetitive error handling logic into
ErrorHandler.
- Import your model’s JSON writes function from your corresponding serializer.
- Include your model’s JSON reads function in your controller for versioning, custom validations, and API clarity:
implicit val postJsonReads = (
  (__ \ "id").read[UUID] and
  (__ \ "title").read[String] and
  ...
)(Post.apply _)
Serializers
Serializers should be versioned and explicit as to which keys and values will be present. Try to avoid macros or other
ways of having your serializers written for you as it can make your payloads more difficult to reason about.
- Create one serializer per model.
- Avoid having domain logic in your serializers wherever possible.
- Use the singularized resource name with
Serializer suffix. E.g. PostSerializer.
implicit val postJsonWrites = new Writes[Post] {
  def writes(post: Post): JsObject = Json.obj(
    "id" -> post.id,
    "title" -> post.title,
    ...
  )
}
Services
Your service layer is where all business logic should exist. Take extra care to keep domain concepts and concerns
separated out and refactor frequently as your understanding of your problem space evolves. Services should be kept to
one concern and one level of abstraction as much as possible. If you find your service is doing both high level
orchestration and low level work, or mixing concerns from multiple domains, you should consider breaking the logic
into more appropriate services.
- Use the singularized resource name with
Service suffix. E.g. PostService.
- Use dependency injection to keep services decoupled.
- Keep services small and preferably < 100 lines of code.
Data Access Objects
Data access concerns including database specific logic or remote API call specifics should be encapsulated here and
hidden from the service layer as much as possible. If your data access objects do not look uniform and simple consider
re-thinking your schema or API as this can be a warning sign that things might be overly complicated.
- Use the singularized resource name with
DAO suffix. E.g. PostDAO.
- Create one DAO per database table or remote resource.
- Move repetitive create, read, update, delete functions into shared
DAOConventions.
Database Migrations
In modern development and production environments database schema changes must be versioned and performed in an
automated way. Raw handwritten SQL statements should be avoided at all costs as well as SSHing into the server and
running ALTER TABLE statements manually. If the framework you are using is like Play and does not include great tools
for automating database migrations out of the box, I would recommend using Liquibase to
perform migrations and a library like Play Liquibase to automate running
migrations in dev and test environments.
- Use environment variables for database connection configuration in
application.conf.
- Use
YYYMMDDHHMMSS_database_migration_description.xml as changelog names.
- Tag your database after making each significant change for easy rollback.
Tests
Testing is an essential part of application development as it provides crucial feedback on your application architecture
and design during the dev process as well as confidence while refactoring. For Scala applications it’s best to prefer
ScalaTest over Specs2 and include integration tests
and unit tests in the same package as the source files.
- Use
Spec as the suffix for unit tests and IntegrationSpec as the suffix for integration tests.
- Reset the DB before each integration test with
DatabaseCleaner to avoid
order-dependant tests.
- Prefer a real database over an in-memory stand in for integration tests to find DB specific bugs.
- Use a Factory library or create your own simple factories like
PostFactory to keep test setup DRY
and expressive.
- Prefer high level integration tests for common paths and unit tests for edge cases and full coverage.
Plugins
Certain concerns like test coverage and code conventions are very infrequently packaged with frameworks and must be
included to support modern development flows. For Play I recommend the following plugins:
Additional Files
Applications on the JVM often have difficult initial setup procedures. In order to have the smoothest dev process you
should include a few extra files for convenience.
- Include a .java-version file with the expected Java
version.
- Include a activator wrapper file that downloads all
necessary dependencies. (serving the app and testing the app should be as simple as:
$ ./activator run and
$ ./activator test).
- Include a resetdb script that drops and re-creates the
database for testing and new developers.
TLDR
Sticking to the conventions of your framework can make development processes streamlined and avoid
bikeshedding. If your framework does not have
conventions then you could gain the same benefits by adopting conventions similar to the ones I laid out in this post.
These conventions apply specifically to CRUD API’s, but you should always find conventions and best practices for the
particular architectural style that your app, framework, and language uses. Conventions are constantly evolving sets of
best practices that are made better by community contribution. If you have any conventions that you like and think I
have missed, please contribute by opening an issue or PR at jtescher/play-api.
22 Jun 2015

Installing development dependencies for all of your company’s applications can be a pain. As a developer this is a
nuisance that wastes time and breaks your flow, and as a designer this can be so frustrating that it stops you from
running applications altogether.
One example could be if your company works primarily in Ruby on Rails, you may have several versions of Ruby running in production as you upgrade them individually to the newest version. This means that when people want to run an app
locally, they need to have the app’s current version of Ruby installed via a tool like RVM or
rbenv. If you are using a database like PostgreSQL in production and want to mirror that configuration in your local development environment to find bugs earlier in the process (a practice which I would encourage), then you also might need to have multiple versions of PostgreSQL installed. All of these individually versioned development dependencies need to be kept up to date as things get upgraded. This can cause problems for a team of developers, but even as a single developer working on a few applications this can become a mess.
An excellent solution to this problem is to use Vagrant to isolate dependencies and their
configuration into a single disposable, consistent environment that can be created and destroyed with a single command.
In this post I will show you how the required current versions of Ruby and PostgreSQL can be added and configured easily
to produce a single easily-reproducible and isolated environment using Vagrant.
All code for this post can be found at github.com/jtescher/vagrant-rails.
Creating The Application
For this example we will create a Rails app that has a database dependency. Remember this will
work with any application. Also note that for simplicity we are creating the Rails app before we start using Vagrant, so
you have to have PostgreSQL installed, but once we add Vagrant later in this example it won’t be required anymore (if
you’re not happy with this you can skip down and install Vagrant first). Let’s first generate a new Rails project that
we’ll call blog.
  $ rails new blog --database=postgresql
  $ cd blog
Let’s now give our blog app a Post scaffold so we can see some posts with a title and a body.
  $ rails generate scaffold post title:string body:string
  $ rake db:create
  $ rake db:migrate
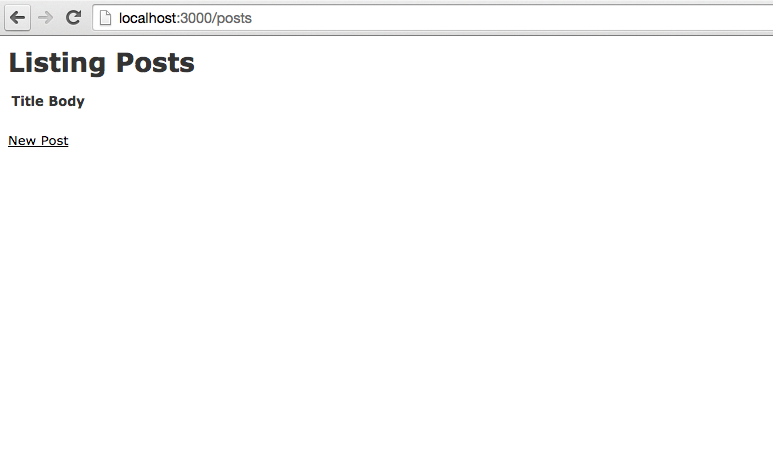
Now let’s start the server and see what we have so far.
If we open localhost:3000/posts, we see our functional blog scaffold.
Let’s now stop the server with Ctrl-C and get the app running inside of Vagrant.
Installing Vagrant
Up until now this has been a pretty typical development process for anyone interacting with a Rails app. You will notice
that anyone who wants to work on your blog has to do a few things now just to get it up and running. Even though this
app couldn’t be simpler, they have to have the right version of Rails installed and all of the other gems in your
Gemfile as well as the right version of PostgreSQL. If you make any changes to either of those things, all other
developers will have to manually update their dependencies. Ugh.
A great solution to this problem is to use Vagrant to manage your dependencies for you.
This will create an isolated development environment for you in a virtual
machine, and at any point if things aren’t working properly or if there are major
changes, you can simply destroy and re-create the whole thing from scratch.
Getting Vagrant installed on your machine is simple with Homebrew.
  $ brew install caskroom/cask/brew-cask
  $ brew cask install virtualbox
  $ brew cask install vagrant
Now that we have VirtualBox installed, we can use Chef through
Vagrant to provision the VM’s. Let’s install Chef, the ChefDK, and the cookbook
manager plugin vagrant-berkshelf as the final part of our setup.
  $ brew cask install chefdk
  $ vagrant plugin install vagrant-berkshelf
Adding Vagrant To Your Project
Vagrant can be configured simply through a Vagrantfile at the root of your project. Let’s add one now for this
project.
Vagrant.configure(2) do |config|

  # Use ubuntu base
  config.vm.box = "ubuntu/trusty64"

  # Forward Rails port
  config.vm.network "forwarded_port", guest: 3000, host: 3000

  # Configure chef recipes
  config.vm.provision :chef_zero do |chef|
    chef.json = {
      'postgresql' => {
        'password'  => {
          'postgres' => 'iloverandompasswordsbutthiswilldo'
        }
      }
    }
    chef.run_list = [
      # Install Ruby
      "recipe[ruby-ng::dev]",

      # Install Node.js for rails assets
      "recipe[nodejs::default]",

      # Install PostgreSQL DB
      "recipe[postgresql::server]"
    ]
  end

end
To download and version the cookbooks used by Chef we can add a Berksfile at the root of your project.
source 'https://supermarket.getchef.com'

cookbook 'ruby-ng', '~> 0.3.0'
cookbook 'postgresql', '~> 3.4.20'
cookbook 'nodejs', '~> 2.4.0'
And the final step is to install the cookbooks with:
Running Vagrant
Now for the magic part. To start your new virtual development environment run:
After your environment has been created, let’s ssh into it and get our rails app running.
$ vagrant ssh
$ cd /vagrant/
$ bundle install
And we can create the development PostgreSQL database via:
$ sudo -u postgres createuser -s vagrant
$ rake db:create
$ rake db:migrate
Your environment is now ready! Let’s start the server:
$ rails server -b 0.0.0.0
You can now if we open localhost:3000/posts, and see your posts scaffold served from the
Vagrant box!
To remove the VM once you’re done working on your application, simply run $ vagrant destroy to remove the environment.
At any time you can easily $ vagrant up and have a brand new environment waiting for you!
Conclusion and TLDR
Vagrant is a great way to create and configure reproducible and portable work environments built on top of
industry-standard technology. It allows you to have a standard way to configure and maintain the way you build and run
applications locally. Once someone creates a Vagrantfile, anyone can simply clone the project and $ vagrant up to
get a fully functional environment in minutes. For designers this means that any time you run into problems, you know
you can simply $ vagrant destroy and $ vagrant up to fix things. For operations engineers it means having a standard
way to test Chef cookbooks and even deploy to clouds like AWS with the same configuration that was used to develop the
application. And finally, for app developers it means having a consistent environment for development, testing, and
production that can easily be maintained and updated across your whole team.
20 Apr 2015
![AWS Elastic Beanstalk]
(https://jtescher.github.io/assets/how-to-set-up-a-rails-4-2-app-on-aws-with-elastic-beanstalk-and-postgresql/aws-logo.png)
I previously posted instructions a year ago about [how to do this in rails 4.1]
(http://jtescher.github.io/how-to-set-up-a-rails-4-1-app-on-aws-with-elastic-beanstalk-and-postgresql/) on an old
version of Elastic Beanstalk. This is the updated version.
Deploying Rails apps can be tricky. For simple projects, tools like Heroku can be perfect.
It’s great for prototyping apps and testing out different ideas without a lot of hassle. However, when your project gets more
complicated and you want to have better control of your servers, load balancers, workers, auto-scaling conditions, etc,
you will not have the flexibility you desire.
There are many services that can be used to get a Rails app up and running quickly while still keeping full
control of your infrastructure. One reasonable option is Amazon’s
Elastic Beanstalk. The service is aptly described by Amazon as follows:
AWS Elastic Beanstalk makes it even easier for developers to quickly deploy and manage applications in the AWS cloud.
Developers simply upload their application, and Elastic Beanstalk automatically handles the deployment details of
capacity provisioning, load balancing, auto-scaling, and application health monitoring.
Now that Amazon supports PostgreSQL via RDS having a fully-managed
postgres-backed Rails app has never been easier!
You can find all of the code for this post at
[github.com/jtescher/example-rails-4.2-elastic-beanstalk-blog]
(https://github.com/jtescher/example-rails-4.2-elastic-beanstalk-blog)
If you get stuck or have other issues the
documentation for Elastic Beanstalk is pretty good.
Getting Started
Sign up for an AWS account via the instructions at the
AWS Console and then download the
Elastic Beanstalk Command Line Tools via Homebrew (or
here for PC).
  $ brew update
  $ brew install aws-elasticbeanstalk
Initialize the Rails app
The most current version of rails at the time of this writing is 4.2.1 so that’s what we will use now.
  $ gem install rails -v 4.2.1
  $ rails new blog
  $ cd blog
  $ git init && git add -A && git commit -m "Add rails scaffold"
Scaffold a Post resource
We will be creating a simple example app that allows you to manipulate posts. To generate this in Rails use:
  $ rails generate scaffold post title:string body:text
  $ bundle exec rake db:migrate
  $ git add -A && git commit -am "Add post resource"
Initialize the Elastic Beanstalk app
Now we can initialize a new Beanstalk app through the eb command.
I would choose the following settings, but for a description of each option see the AWS example
here.
  Select a default region
  3) us-west-2 : US West (Oregon)

  Select an application to use
  [ Create new Application ]

  Enter Application Name
  blog
  Application blog has been created.

  It appears you are using Ruby. Is this correct?
  (y/n): y

  Select a platform version.
  1) Ruby 2.2 (Puma)

  Do you want to set up SSH for your instances?
  (y/n): n
This will set up a .elasticbeanstalk directory in the root of your project and add it to your .gitignore file. You
do not want your configuration stored in git because there could be private information in there. Let’s
commit those changes now:
$ git commit -am "Ignore elasticbeanstalk settings"
Creating the Elastic Beanstalk environment
You can have many environments per Elastic Beanstalk application. This can be useful for having both dev and production
environments for the same app.
To create a new environment, run the following:
  $ eb create blog-env:

  Creating application version archive "b303".
  Uploading blog/b303.zip to S3. This may take a while.
  Upload Complete.
  Environment details for: blog-env
    Application name: blog
    Region: us-west-2
    Deployed Version: b303
    Environment ID: e-g5mkeawrnz
    Platform: 64bit Amazon Linux 2015.03 v1.3.0 running Ruby 2.2 (Puma)
    Tier: WebServer-Standard
    CNAME: UNKNOWN
    Updated: 2015-04-19 23:38:50.955000+00:00
  Printing Status:
  INFO: createEnvironment is starting.
  INFO: Using elasticbeanstalk-us-west-2-83376862866 as Amazon S3 storage bucket for environment data.
  INFO: Created load balancer named: awseb-e-g-AWSEBLoa-7R0CSEMQ6W2M
  INFO: Created security group named: awseb-e-g5mkeawrnz-stack-AWSEBSecurityGroup-56IUD2ZYQ5FR
  INFO: Created Auto Scaling launch configuration named: awseb-e-g5mkeawrnz-stack-AWSEBAutoScalingLaunchConfigurat...
  INFO: Created Auto Scaling group named: awseb-e-g5mkeawrnz-stack-AWSEBAutoScalingGroup-2URXDKL0NCIJ
  INFO: Waiting for EC2 instances to launch. This may take a few minutes.
  INFO: Created Auto Scaling group policy named: arn:aws:autoscaling:us-west-2:833768628226:scalingPolicy:02920f8b...
  INFO: Created Auto Scaling group policy named: arn:aws:autoscaling:us-west-2:833768628666:scalingPolicy:b143cea1...
  INFO: Created CloudWatch alarm named: awseb-e-g5mkeawrnz-stack-AWSEBCloudwatchAlarmHigh-APCUnlMHNIS1
  INFO: Created CloudWatch alarm named: awseb-e-g5mkeawrnz-stack-AWSEBCloudwatchAlarmLow-1UL48B2CC2OM8
  INFO: Added EC2 instance 'i-7f4b6eb7' to Auto Scaling Group 'awseb-e-g7mkeawrnz-stack-AWSEBAutoScalingGroup-2URX...
  INFO: Application available at blog-env-zckzptpdgy.elasticbeanstalk.com.
  INFO: Successfully launched environment: blog-env
The environment should now be running. To see the status and URL:
  $ eb status
  Environment details for: blog-env
    Application name: blog
    Region: us-west-2
    Deployed Version: b303
    Environment ID: e-g5mkeawrn
    Platform: 64bit Amazon Linux 2015.03 v1.3.0 running Ruby 2.2 (Puma)
    Tier: WebServer-Standard
    CNAME: blog-env-zckzptpdg2.elasticbeanstalk.com
    Updated: 2015-04-19 23:51:59.259000+00:00
    Status: Ready
    Health: Green
The last thing that we have to do to get Rails set up is to add a SECRET_KEY_BASE environment variable.
To generate a new secret key use:
  $ rake secret
  f655b5cfeb452e49d9182c6b5e6856704e6e1674082fa1e5f1a330782bad1833ba4cc30951e094f9250c87573dc0bbd3d46d37c5d79ff57...
Then in order to add the secret to your elastic beanstalk environment, use:
$ eb setenv SECRET_KEY_BASE=f655b5cfeb452e49d9182c6b5e6856704e6e1674082fa1e5f1a330782bad1833ba4cc30951e094f9250...
Now if you navigate to [YOUR-ENV].elasticbeanstalk.com/posts you should see your posts index view:
![Posts Index]
(https://jtescher.github.io/assets/how-to-set-up-a-rails-4-2-app-on-aws-with-elastic-beanstalk-and-postgresql/posts-index.png)
Using PostgreSQL with Rails
Right now our app is just using SQLite, which is not made for production use and cannot be shared across instances.
We can solve this by adding PostgreSQL to your app and to your Elastic Beanstalk environment.
Adding the pg gem
Open your Gemfile. Move the sqlite3 gem into your development and test block and add a production group with
the pg gem in it. Afterward it should look something like this:
  source 'https://rubygems.org'


  # Bundle edge Rails instead: gem 'rails', github: 'rails/rails'
  gem 'rails', '4.2.1'
  # Use SCSS for stylesheets
  gem 'sass-rails', '~> 5.0'
  # Use Uglifier as compressor for JavaScript assets
  gem 'uglifier', '>= 1.3.0'
  # Use CoffeeScript for .coffee assets and views
  gem 'coffee-rails', '~> 4.1.0'
  # See https://github.com/rails/execjs#readme for more supported runtimes
  # gem 'therubyracer', platforms: :ruby

  # Use jquery as the JavaScript library
  gem 'jquery-rails'
  # Turbolinks makes following links in your web application faster. Read more: https://github.com/rails/turbolinks
  gem 'turbolinks'
  # Build JSON APIs with ease. Read more: https://github.com/rails/jbuilder
  gem 'jbuilder', '~> 2.0'
  # bundle exec rake doc:rails generates the API under doc/api.
  gem 'sdoc', '~> 0.4.0', group: :doc

  # Use ActiveModel has_secure_password
  # gem 'bcrypt', '~> 3.1.7'

  # Use Unicorn as the app server
  # gem 'unicorn'

  # Use Capistrano for deployment
  # gem 'capistrano-rails', group: :development

  group :development, :test do
    # Use sqlite3 as the database for Active Record
    gem 'sqlite3', '~> 1.3.10'

    # Call 'byebug' anywhere in the code to stop execution and get a debugger console
    gem 'byebug'

    # Access an IRB console on exception pages or by using <%= console %> in views
    gem 'web-console', '~> 2.0'

    # Spring speeds up development by keeping your application running in the background. Read more: https://github.com/rails/spring
    gem 'spring'
  end

  group :production do
    # Use PostgreSQL as the database for Active Record
    gem 'pg', '~> 0.18.1'
  end
Now run $ bundle install to install the gem.
Configuring database.yml to work with RDS postgres
Database credentials should never be hard coded and Elastic Beanstalk makes setting them as environment variables quite simple.
RDS variables are configured and updated automatically so your production section of config/database.yml can be
updated to the following:
  production:
    <<: *default
    adapter: postgresql
    encoding: unicode
    database: <%= ENV['RDS_DB_NAME'] %>
    username: <%= ENV['RDS_USERNAME'] %>
    password: <%= ENV['RDS_PASSWORD'] %>
    host: <%= ENV['RDS_HOSTNAME'] %>
    port: <%= ENV['RDS_PORT'] %>
Getting the pg gem to work on Elastic Beanstalk
Now let’s add the database to our environment. This takes a few steps but I’ll walk you through it. First go to the
Elastic Beanstalk section in the AWS console: [console.aws.amazon.com/elasticbeanstalk/?region=us-west-2]
(https://console.aws.amazon.com/elasticbeanstalk/?region=us-west-2) (Note the region is us-west-2, if you deployed to
a different region, check there.)
![Blog App Environment]
(https://jtescher.github.io/assets/how-to-set-up-a-rails-4-2-app-on-aws-with-elastic-beanstalk-and-postgresql/blog-env.png)
Now click on blog-env and go to configuration on the left nav. At the bottom you should see:
![Data Tier]
(https://jtescher.github.io/assets/how-to-set-up-a-rails-4-2-app-on-aws-with-elastic-beanstalk-and-postgresql/data-tier.png)
Now click “create a new RDS database”, set the DB Engine to “postgres” and create a Master Username and Master Password.
![Database Config]
(https://jtescher.github.io/assets/how-to-set-up-a-rails-4-2-app-on-aws-with-elastic-beanstalk-and-postgresql/db-config.png)
Click “Save” and you will have a fully functioning PostgreSQL instance and the environment variables will have been added to
your Beanstalk environment automatically.
Now to install the pg gem on your server the postgresql93-devel yum package is required. Configuring packages on
Elastic Beanstalk instances is as simple as dropping a YAML formatted .config file in a top level .ebextensions folder.
  # .ebextensions/packages.config
  packages:
    yum:
      postgresql93-devel: []
Now commit this change and redeploy the app.
  $ git add -A && git commit -am "Add PostgreSQL as production database"
  $ eb deploy
Once this is done you can reload the /posts page and see your fully-functional postgres-backed Rails app! Hooray!
![Posts Index]
(https://jtescher.github.io/assets/how-to-set-up-a-rails-4-2-app-on-aws-with-elastic-beanstalk-and-postgresql/posts-index.png)
15 Dec 2014

Learning new languages can be a great way to expand your skills and stay up to date with software development
trends. The language that I’m currently learning is Scala! It’s a great language for picking up functional programming
concepts, and it being on the JVM allows you to leverage the Java ecosystem’s libraries and frameworks. In this post I’ll
show you how to install Scala and give you a few resources to get you started.
Installing Scala
To install Scala you need to install a Java runtime version 1.6 or later. Once you have
that installed you can install Scala through homebrew if you are on a mac, or follow these
instructions if you are not.
Using Scala
You can get started playing with the language basics from the terminal with the scala command.
$ scala
Welcome to Scala version 2.11.4 (Java HotSpot(TM) 64-Bit Server VM, Java 1.8.0_25).
Type in expressions to have them evaluated.
Type :help for more information.

scala>
Here you can evaluate simple expressions and quickly try a few things (enter :quit to exit the REPL).
scala> println("Hello world")
Hello world

scala>
Learning Scala
Scala has great free resources to get you up to speed quickly. I would recommend the following:
-
The online course Functional Programming Principles in Scala available on
Coursera. This class is taught by the creator of Scala, Martin Odersky, and is a good overview of scala functional
programming styles.
-
The Principles of Reactive Programming course, also taught by
Martin and goes into a lot of ways to create composable software that is event-driven, scalable under load, resilient
and responsive in the presence of failures
-
The books Programming in Scala and [Scala in Action]
(http://www.manning.com/raychaudhuri/) which cover the language features in depth.
-
Also Kojo which is an interesting interactive learning environment.
03 Jun 2014
Writing small command line utilities and bash scripts can save you a lot of time as a developer. People often don’t take
advantage of them though because they feel intimidated and confused by the ones they use every day like $ git status
or $ rails new and it seems like there is just too much to learn. While it’s true that some utilities are pretty
complicated, writing simple scripts is fairly painless and can help you greatly with repetitive tasks or when using an
application that doesn’t need a graphical interface.
In this post I’ll show you how to create a simple calculator app/utility starting from in-line shell scripts in ruby and
moving up to using the Thor gem. Even though my examples with Thor are pretty simple,
it can be used to build quite powerful and expressive projects like the Twitter CLI and
the Rails CLI.
I’m going to use a simple calculator with just add and subtract functions as examples but they are just placeholders for
whatever work you want to do. I’ll show how this functionality can be implemented in three versions: a simple inline
version, a more complicated version with command line options, and finally a version that uses Thor.
Starting Small: Inline scripts
To get started, we want to be able to add a group of numbers and subtract a group of numbers. This is so simple that it
can be expressed as a one line Ruby script and evaluated directly. The ruby command lets you pass in arbitrary Ruby
code that can be executed with the -e flag. The simplest version of our program then would be to add numbers
in Ruby and use puts to print out the results:
And we can implement our subtraction solution the same way:
$ ruby -e "puts 11 - 6"
5
That’s pretty simple. If your needs can be fulfilled with that then there is no need to go on. But most requirements are
not that basic. If you want to be able to let someone who does not understand Ruby use this then you want a simpler,
more well-defined interface for them to use.
Adding Complexity: Command Line Options
A step up from having your code evaluated in-line would be to have a defined set of functions that a user could call,
passing the arguments in from the terminal. This would allow them to find their answers without all the knowledge of
how the results are calculated and returned.
To do this, you can save your methods to a file (call it whatever you like, I am going with calculator for this
example). Remember to make your file executable with $ chmod +x calculator.
In Ruby all command line options are available to scripts as ARGV so we can use this to allow options to be passed in.
Below are the two methods that will take the options and perform the operations on them (the first line just says that
this file should be interpreted as ruby code):
#!/usr/bin/env ruby

def add(args)
  puts args.map(&:to_f).inject(:+)
end

def subtract(args)
  puts args.map(&:to_f).inject(:-)
end

send(ARGV.shift, ARGV) if ARGV.length
The two functions first convert the user input from strings, and then either sum with “+” or take the difference with
“-“. The last line grabs the first argument as the name of the method to use and the rest of the arguments as the inputs.
Then you can execute this application passing in the arguments with:
$ ./calculator add 1 2 3
6.0
$ ./calculator subtract 10 6
4.0
This is still a very simple example, but you can see how this technique could be used to encapsulate more complicated
ideas into scripts with cleaner interfaces.
However, once you want to package your application for others to use or develop lots of complicated options that need
explaining and option parsing this can get messy and repetitive. I’ve found that the best way to create powerful and
well documented applications and utilities in Ruby is to use Thor.
Creating Command Line Interfaces With Thor
Thor is built exactly for the purpose of writing command line applications like
this. Here is how it is described by the creators:
Thor is a simple and efficient tool for building self-documenting command line utilities. It removes the pain of
parsing command line options, writing “USAGE:” banners, and can also be used as an alternative to the Rake build tool.
The syntax is Rake-like, so it should be familiar to most Rake users.
You can install Thor with gem install thor, and then replace your calculator file with:
#!/usr/bin/env ruby

require 'thor'

class Calculator < Thor

  desc "add ...ARGS", "Calculate the sum of all numbers in ARGS"
  def add(*args)
    say args.map(&:to_f).inject(:+)
  end

  desc "subtract ...ARGS", "Calculate the difference of all numbers in ARGS"
  def subtract(*args)
    say args.map(&:to_f).inject(:-)
  end

end

Calculator.start(ARGV)
This should look very familiar by now, the difference is that you now have a class that inherits from Thor, and Thor
will parse the options and build the output for you.
It also gives you a convenient way to list all options by passing no arguments when you execute calculator:
$ ./calculator
Commands:
  calculator add ...ARGS       # Calculate the sum of all numbers in ARGS
  calculator help [COMMAND]    # Describe available commands or one specific command
  calculator subtract ...ARGS  # Calculate the difference of all numbers in ARGS
And you can pass in arguments as usual:
$ ./calculator add 1 2 3
6.0
It is as simple as that. Thor gives you the power to create well documented and full-featured utilities simply and
quickly. If you want to know more about Thor and all of it’s fancy features like sub commands you can go on to read the
helpful whatisthor.com site.