27 May 2014
Rails performance out of the box is acceptable for prototypes and small applications with limited traffic. However as
your application grows in popularity you will inevitably be faced with the decision to either add more servers, or use
your existing servers more efficiently. Complex caching strategies can be incredibly difficult to implement correctly,
but simple caching layers can go a long way.
In this post I’ll explain two basic Rails caching mechanisms and explain some of the costs and benefits of each.
HTTP Caching
If your API responses are mostly static content like a list of available products, then
HTTP Caching can be a very effective solution. Even something
as low as a one minute cache can move the vast majority of your requests to a CDN like
CloudFlare or an in-memory store like
rack cache.
Specifying the expiration time is simple. In your controller action just call expires_in with the time:
class ProductsController < ApplicationController
  def index
    expires_in 1.minute, public: true
    @products = Product.all
  end
end
This will result in a header being set to Cache-Control: max-age=60, public which any CDN will pick up and serve for
you instead of the request hitting your server.
This solution works well when the content is mostly static but it comes with the downside that changes to your content
will not be seen for up to one minute (or whichever time you have chosen).
Conditional GET
Another option is using ETags or Last-Modified times to know what version of the resource the client has last seen and
returning a HTTP 304 Not Modified response with no content if the resource has not changed.
To set this up in a controller you can either use the
fresh_when or
stale? methods. Here is an
example using the fresh_when method.
class ProductsController < ApplicationController
  def show
    @product = Product.find(params[:id])
    fresh_when(etag: @product, last_modified: @product.created_at, public: true)
  end
end
This method attaches an ETag header and a Last-Modified header to every product response. Now if you make a request
for a given product you will see the headers in the response:
curl -i localhost:3000/products/1.json
HTTP/1.1 200 OK
ETag: "91206795ac4c5cd1b02d8fcbc752b97a"
Last-Modified: Mon, 27 May 2014 09:00:00 GMT
...
And if you make the same request but include the ETag in a If-None-Match header, the server can return 304 with empty
content and save all the time it would have spent rendering the content.
curl -i localhost:3000/products/1.json \
  --header 'If-None-Match: "91206795ac4c5cd1b02d8fcbc752b97a"'
HTTP/1.1 304 Not Modified
Etag: "91206795ac4c5cd1b02d8fcbc752b97a"
Last-Modified: Mon, 27 May 2014 09:00:00 GMT
...
The other option is to use the If-Modified-Since header in the request, which will have the same result:
curl -i localhost:3000/products/1.json \
  --header 'If-Modified-Since: Mon, 27 May 2014 09:00:00 GMT'
HTTP/1.1 304 Not Modified
Etag: "91206795ac4c5cd1b02d8fcbc752b97a"
Last-Modified: Mon, 27 May 2014 09:00:00 GMT
...
This method still requires a request to be made to the Rails app, and the product still has to be pulled from the
database to determine the created_at time. However, rendering the response body can be a substantial portion of
each server response so this is a simple way to save a lot of time.
These examples are only the beginning of the caching options Rails offers. As of Rails 4
page caching as well as
action caching have been pulled out into their own gems and are
worth looking at if you need those options.
Finally if you are ready for something a little more robust you can read about Basecamp’s
Russian Doll Caching to see how they solve
these problems.
12 May 2014
I’ve been interested in Go for a long time now. The language has lots of aspects that make it well suited for building
modern web applications including its powerful standard library, concurrency primitives, and
impressive performance benchmarks. The community is also gaining a lot of
ground in terms of tooling, web frameworks, and other resources for creating sites in Go.
In this post I will show you how to create a basic app in Go and how to host it on Heroku.
If you do not have Go installed on your system, you can do so on a mac with $ brew install go or follow the
instructions here. Also if you’re interested in learning the basics of Go,
be sure to check out A Tour of Go.
If you get stuck you can find all of the code for this post at
github.com/jtescher/example-revel-app.
Creating a Revel App

Revel is a high-productivity web framework for the Go language. It has an impressive feature set and is much more in
line with the rails “convention over configuration” approach than most other Go web frameworks.
To get the project started, first install Revel into your $GOPATH:
$ go get github.com/revel/cmd/revel
Then we can create a new app with the revel new command. Remember you should use your own github username below:
$ revel new github.com/jtescher/blog
And we can start up the app using the revel run command. Again use your github usename, not mine.
$ revel run github.com/jtescher/blog
~
~ revel! http://robfig.github.com/revel
~
INFO  2014/05/11 16:50:10 revel.go:292: Loaded module static
INFO  2014/05/11 16:50:10 revel.go:292: Loaded module testrunner
INFO  2014/05/11 16:50:10 run.go:57: Running blog (github.com/jtescher/blog) in dev mode
INFO  2014/05/11 16:50:10 harness.go:157: Listening on :9000
INFO  2014/05/11 16:50:23 revel.go:292: Loaded module testrunner
INFO  2014/05/11 16:50:23 revel.go:292: Loaded module static
INFO  2014/05/11 16:50:23 main.go:29: Running revel server
Go to /@tests to run the tests.
Now you can go to localhost:9000 and you should see the welcome page.

Serving Content From Revel
Revel has an easily understood MVC structure and ships with bootstrap by default. You can read more about the flow of
control through a Revel app in their excellent core concepts
documentation, but for now let’s just render some custom content by adjusting the App/index.html view. Revel uses Go’s
built in templating for HTML rendering.
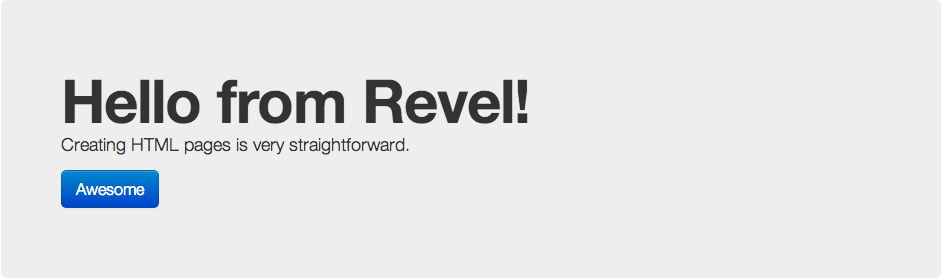
<!-- app/views/App/index.html -->


<div class="container">
  <div class="hero-unit">
    <h1>Hello from Revel!</h1>
    <p>Creating HTML pages is very straightforward.</p>
    <p><a class="btn btn-primary btn-large" role="button">Awesome</a></p>
  </div>

  <div class="row">
    <div class="span6">

    </div>
  </div>
</div>
And if you reload the page you should see your changes.
Deploying The App
Deploying a Revel app to Heroku is quite simple. First we create a .godir file at the root of our project with the
path to the project in it.
$ echo "github.com/jtescher/blog" > .godir
Then we can create the app on Heroku using a buildpack.
$ heroku create -b https://github.com/robfig/heroku-buildpack-go-revel.git
And finally we can push our app to Heroku.
$ git push heroku
$ heroku open
And that’s it! Your Revel app should now be live.
28 Apr 2014
This is part three of a series on building a metrics dashboard with Ember, Bootstrap, and Rails. Over the next few weeks
I will be building out more functionality and writing posts to cover that. If you haven’t read
part one and
part two then that’s a good place to start.
In part two we ended up with an Ember app that rendered
dynamic tables. If you followed along, your page should now look like this:
Today we’re going to add some graphs and see how Ember components work.
Remember, if you get stuck you can find all of the code for this post at
github.com/jtescher/example-ember-rails-dashboard.
Choosing The Right Library
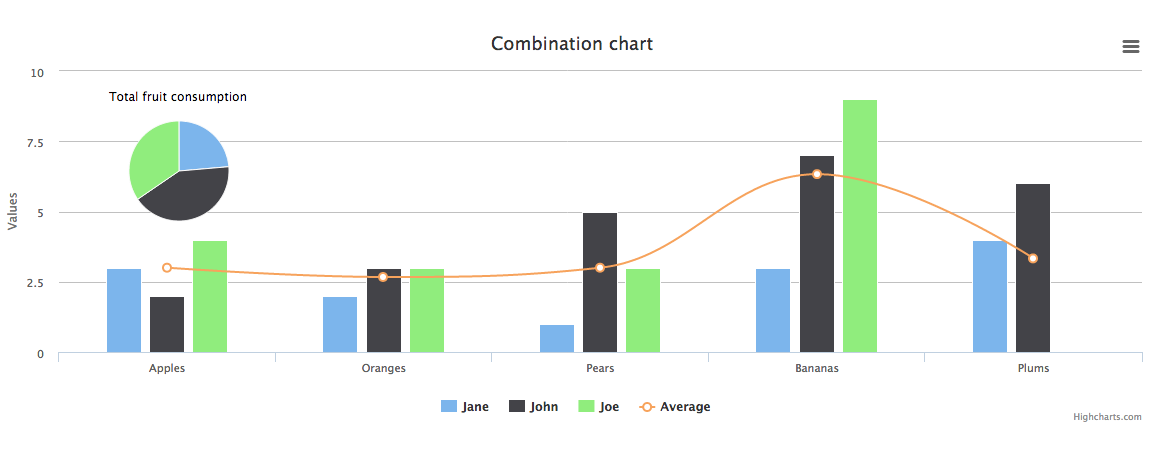
There are many good options when it comes to JavaScript graphing, charting, and visualizations. I find
highcharts to be a good place to get started and it is free for non-commercial uses!
If you find yourself needing more control or having a very specific requirement you can always look at projects like
d3.js.
Adding Highcharts
Let’s download the latest version of highcharts to our vendor/assets/javascripts directory.
$ curl http://code.highcharts.com/4.0.1/highcharts.js \
    -o vendor/assets/javascripts/highcharts-4.0.1.js
And then require the file in app/assets/javascripts/application.js
...
//= require jquery
//= require accounting-0.3.2
//= require highcharts-4.0.1
//= require_tree .
Creating The Ember Component
Ember makes adding reusable components quite simple. We can add a component that represents a specific chart we want to
show on the screen and have ember re-render the chart whenever the data changes. You can read more about how the Ember
components work here.
As an example we can add a highcharts column chart to show revenue by product. First let’s add the component in our
app/assets/javascripts/templates/orders.hbs file:
<h1>Orders</h1>


<table class='table table-striped'>
...
Then we can add the template for the component in app/assets/javascripts/templates/components/column-chart.hbs:
<div style='width: 100%;'></div>
And finally we can define the component in app/assets/javascripts/components/column-chart.js.coffee:
Dashboard.ColumnChartComponent = Ember.Component.extend
  tagName: 'div'
  classNames: ['highcharts']

  contentChanged: (->
    @rerender()
  ).observes('series')

  didInsertElement: ->
    $("##{@chartId}").highcharts({
      chart: { type: 'column' },
      title: { text: 'Revenue by Product' },
      legend: { enabled: false },
      xAxis: {
        title: {
          text: 'Product Number'
        }
      },
      series: [{
        name: 'Quantity',
        data: [4, 4]
      }, {
        name: 'Revenue',
        data: [10.0, 10.0]
      }]
    })

  willDestroyElement: ->
    $("##{@chartId}").highcharts().destroy()
Then when you reload the page it should look like this:
Binding Data To The Ember Component
The chart we have is currently always showing the same series because we hard coded it in the component. Let’s now make
this dynamic by adding the data in the route and using data bindings.
First let’s update the data in our orders route to include a product id.
# app/assets/javascripts/routes/orders_route.js.coffee
Dashboard.OrdersRoute = Ember.Route.extend({
  model: ->
    [
      {
        id: 1,
        firstName: 'James',
        lastName: 'Deen',
        quantity: 1,
        revenue: '10.00',
        productId: 0,
      },
      {
        id: 2,
        firstName: 'Alex',
        lastName: 'Baldwin',
        quantity: 2,
        revenue: '20.00',
        productId: 1,
      }
    ]
})
And then we can build our chart series in the orders controller (this is a very simplistic example):
Dashboard.OrdersController = Ember.ArrayController.extend({

  ...

  chartSeries: (->
    revenues = @map((order)->
      parseFloat(order.revenue)
    )
    quantities = @mapBy('quantity')

    [
      {
        name: 'Quantity',
        data: quantities
      },
      {
        name: 'Revenue',
        data: revenues
      }
    ]
  ).property('@each')

})
We can then bind chartSeries in orders.hbs:
<h1>Orders</h1>


<table class='table table-striped'>
And finally use series in our chart component:
# app/assets/javascripts/components/column-chart.js.coffee
...
didInsertElement: ->
  $("##{@chartId}").highcharts({
    chart: { type: 'column' },
    title: { text: 'Revenue by Product' },
    legend: { enabled: false },
    xAxis: {
      title: {
        text: 'Product Number'
      }
    },
    series: @series
  })
...
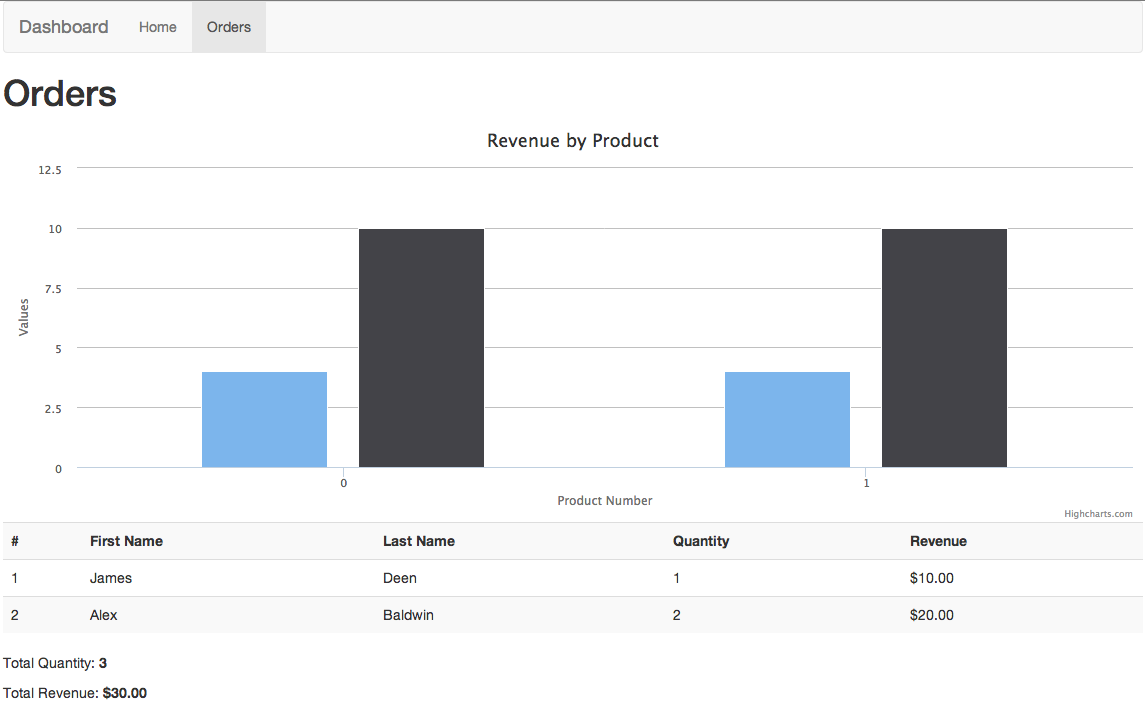
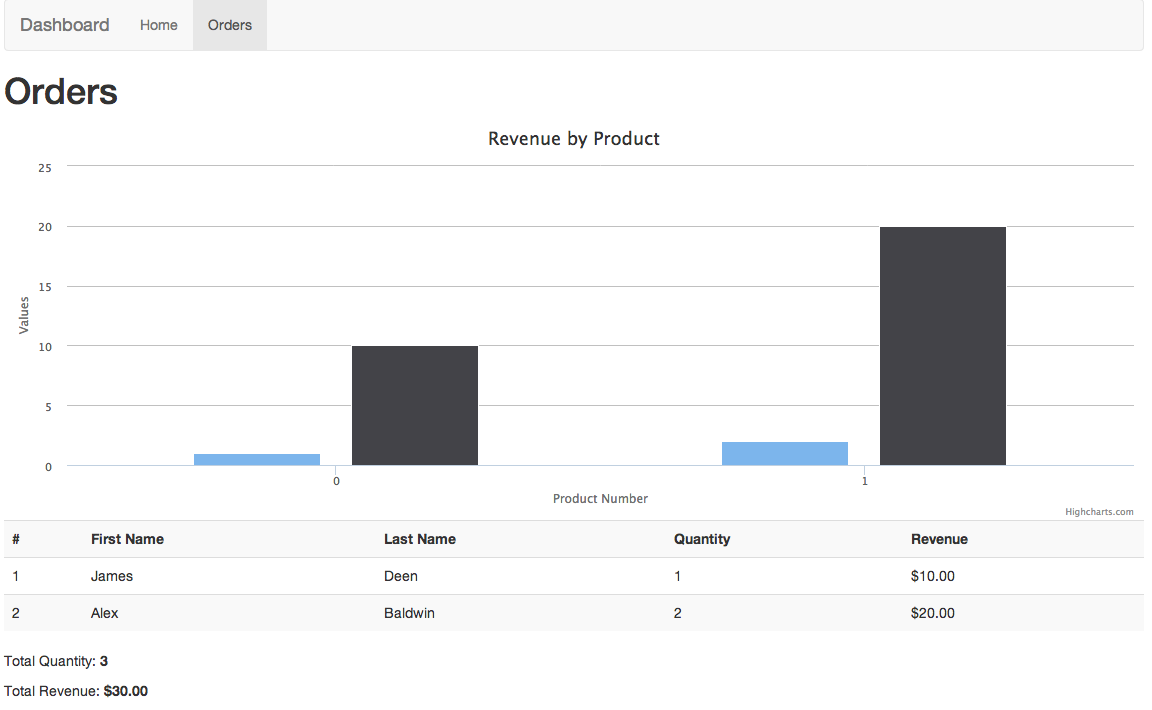
We then end up with our final dynamic chart rendered by Ember:
21 Apr 2014
This is part two of a series on building a metrics dashboard with Ember, Bootstrap, and Rails. Over the next few weeks
I will be building out more functionality and writing posts to cover that. If you haven’t read
part one then that’s a good place to start. You can find
part three here when you are finished.
In part one we ended up with a Rails app that generated
the Ember app that rendered our metrics page. If you followed along your page should now look like this:

Today we’re going to add some tables and see how data flows through an Ember app. If you are not familiar with Ember’s
conventions and idioms you should first read their
excellent documentation and guides before continuing here.
Remember, if you get stuck you can find all of the code for this post at
github.com/jtescher/example-ember-rails-dashboard.
Preparing the application
Before we add any more content let’s update our Ember application template and add a basic structure with some
navigation in app/assets/javascripts/templates/application.hbs.
<div class='container'>

  <header class='masthead'>
    <nav class='navbar navbar-default' role='navigation'>
      <div class='container-fluid'>
        <div class='navbar-header'>
          <button type='button' class='navbar-toggle'
              data-toggle='collapse' data-target='#main-nav-collapse'>
            <span class='sr-only'>Toggle navigation</span>
            <span class='icon-bar'></span>
            <span class='icon-bar'></span>
            <span class='icon-bar'></span>
          </button>
          Dashboard
        </div>

        <div class='collapse navbar-collapse' id='main-nav-collapse'>
          <ul class='nav navbar-nav'>

              Home

          </ul>
        </div>
      </div>
    </nav>
  </header>

  <section class='main-content'>

  </section>

</div>
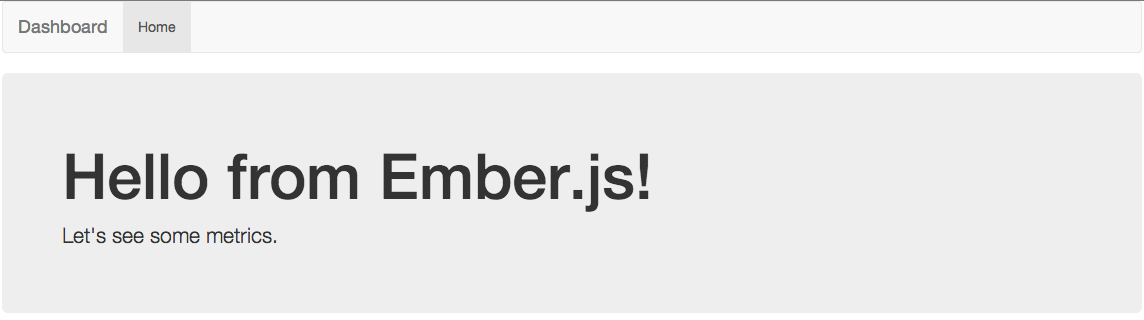
And let’s add an index template so we know when we’re on the home page in app/assets/javascripts/templates/index.hbs.
<div class='jumbotron'>
  <h1>Hello from Ember.js!</h1>
  <p>Let's see some metrics.</p>
</div>
If you reload the page you should now see this:
Creating Tables with Ember and Handlebars
Often the simplest way to display metrics data is to just put it all in a table. I find that it is often helpful
when creating HTML with JavaScript to first start out with the final result and slowly add dynamic content in pieces.
Let’s create an example of this to display some financial data about our sales process.
Step one is to create the Ember route to get to this URL. Let’s edit app/assets/javascripts/router.js.coffee and add it:
# app/assets/javascripts/router.js.coffee
Dashboard.Router.map ()->
  @resource('orders')
And we can then create an idea of what we want the page to look like by mocking up some static HTML in app/assets/javascripts/templates/orders.hbs
<h1>Orders</h1>
<table class='table table-striped'>
  <tr>
    <th>#</th>
    <th>First Name</th>
    <th>Last Name</th>
    <th>Quantity</th>
    <th>Revenue</th>
  </tr>
  <tr>
    <td>1</td>
    <td>James</td>
    <td>Deen</td>
    <td>1</td>
    <td>$10.00</td>
  </tr>
  <tr>
    <td>2</td>
    <td>Alex</td>
    <td>Baldwin</td>
    <td>2</td>
    <td>$20.00</td>
  </tr>
</table>

<p>Total Quantity: <b>3</b></p>
<p>Total Revenue: <b>$30</b></p>
Then we can add a link to this page in our application.hbs file (the double link-to is an annoying hack but
explained here):
...
<div class='collapse navbar-collapse' id='main-nav-collapse'>
  <ul class='nav navbar-nav'>

      Home


      Orders

  </ul>
</div>
...
Then if you reload and follow the orders nav link you should see this:
Creating Dynamic Tables
In Ember, a template typically retrieves information to display from a controller, and the controller is set up by its
route. Let’s make this table dynamic by assigning the data required to build it in the OrdersRoute.
# app/assets/javascripts/routes/orders_route.js.coffee
Dashboard.OrdersRoute = Ember.Route.extend({
  model: ->
    [
      {
        id: 1,
        firstName: 'James',
        lastName: 'Deen',
        quantity: 1,
        revenue: '10.00',
      },
      {
        id: 2,
        firstName: 'Alex',
        lastName: 'Baldwin',
        quantity: 2,
        revenue: '20.00',
      }
    ]
})
And then we set up the controller to process the totals in the OrdersController.
# app/assets/javascripts/controllers/orders_controller.js.coffee
Dashboard.OrdersController = Ember.ArrayController.extend({

  totalQuantity: (->
    @reduce(((previousValue, order) ->
      previousValue + order.quantity
    ), 0)
  ).property('@each')

  totalRevenue: (->
    @reduce(((previousValue, order) ->
      previousValue + parseFloat(order.revenue)
    ), 0)
  ).property('@each')

})
And this lets us use the data provided by the controller in the template:
<h1>Orders</h1>
<table class='table table-striped'>
  <tr>
    <th>#</th>
    <th>First Name</th>
    <th>Last Name</th>
    <th>Quantity</th>
    <th>Revenue</th>
  </tr>

  <tr>
    <td></td>
    <td></td>
    <td></td>
    <td></td>
    <td></td>
  </tr>

</table>

<p>Total Quantity: <b></b></p>
<p>Total Revenue: <b></b></p>
If you reload the page it should now look like this:
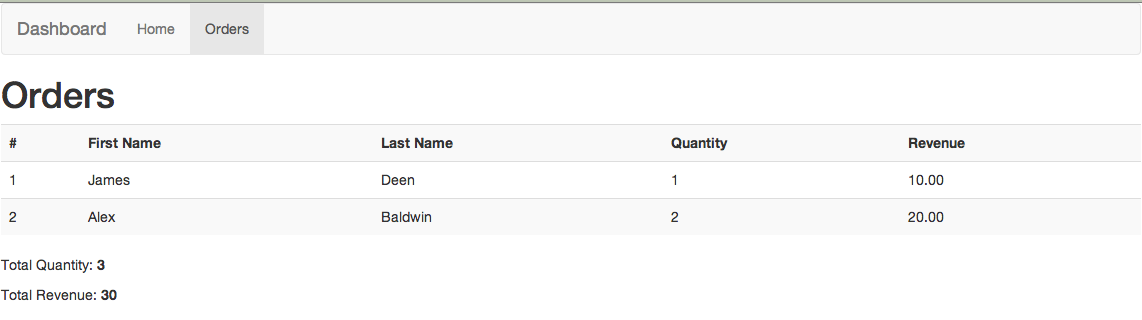
The image above looks pretty good but we seem to have lost our currency formatting. There are a few good libraries for
formatting currencies in JavaScript, and Ember makes it simple to access these libraries in your handlebars templates.
Let’s add the accounting.js library to format our revenue numbers.
First install the library to vendor/assets/javascripts:
$ curl https://raw.github.com/josscrowcroft/accounting.js/master/accounting.js -o vendor/assets/javascripts/accounting-0.3.2.js
Then include it in your application.js file:
//= require jquery
//= require accounting-0.3.2
//= require_tree .
Then create a currency_helpers.js.coffee file to wrap the library.
# app/assets/javascripts/helpers/currency_helpers.js.coffee
Ember.Handlebars.registerBoundHelper('numberToCurrency', (number) ->
  accounting.formatMoney(number)
)
And finally we can use this helper in our orders.hbs view:
...

  <tr>
    <td></td>
    <td></td>
    <td></td>
    <td></td>
    <td></td>
  </tr>

</table>

<p>Total Quantity: <b></b></p>
<p>Total Revenue: <b></b></p>
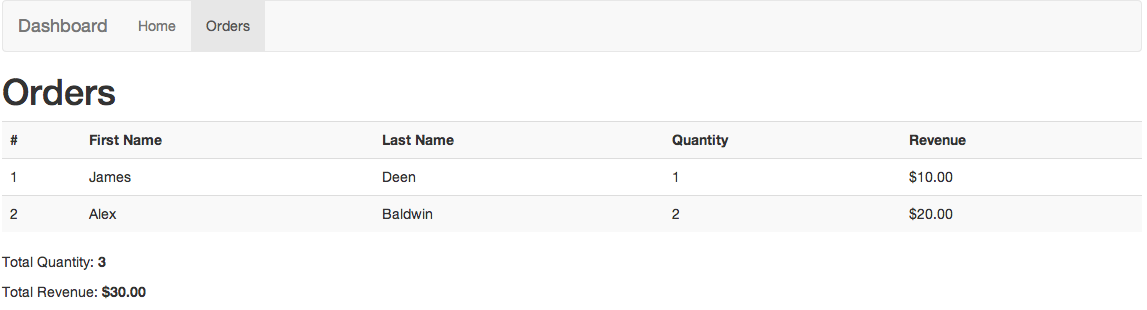
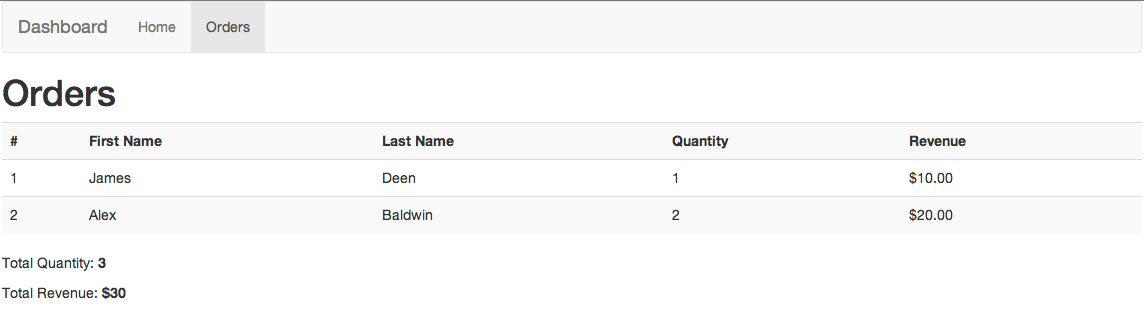
Now that our numbers are formatted properly you can reload the page and see our final result for part 2:
You can now go on to part three and start adding some
charts!
07 Apr 2014
This is part one of a series on building a metrics dashboard with Ember, Bootstrap, and Rails. Over the next few weeks
I will be building out more functionality and writing posts to cover that. You can find part two
here.
There are some services that will provide dashboards and visualizations for you like
Geckoboard, but once you need to provide custom analytics and graphs to clients or
co-workers you will need something a little more flexible.
Today we’re going to assemble the first pieces of this app by creating a Rails server, an Ember.js App and some basic
Bootstrap styling.
You can find all of the code for this post at
github.com/jtescher/example-ember-rails-dashboard.
The Rails Server
We want to be able to expose all of our stats from various internal and third party services with a consistent API so
this server will primarily handle authentication and data transformation. This server could just as easily be written
in Node.js or any language/framework, but for now we’ll stick with Rails.
Create the server (skipping ActiveRecord and TestUnit because we don’t need a database for this app and we will be
testing with Rspec):
$ rails new dashboard --skip-test-unit --skip-active-record
Then we want to add the route that will render our dashboard. We will use the home controller and the index action:
$ rails generate controller Home index --no-helper --no-assets
We wil route everything to Ember, so replace your config/routes.rb file with the following:
# config/routes.rb
Rails.application.routes.draw do
  root 'home#index'
end
If you start your server now with $ rails server and open up localhost:3000 you should see
the following:

The Theme
We will be using stock Twitter Bootstrap for this project so let’s add the bootstrap-sass
gem to our Gemfile.
...
# Front-end framework for developing responsive, mobile first projects on the web.
gem 'bootstrap-sass', '~> 3.1.1'
And configure it by creating a bootstrap_config.css.scss file.
// app/assets/stylesheets/bootstrap_config.css.scss
@import "bootstrap";
Then we can change the home/index.html.erb view to the following:
<div class='container'>
  <div class='jumbotron'>
    <h1>Hello from Twitter Bootstrap!</h1>
    <p>Lots of predefined style that makes things easy to prototype!</p>
  </div>
</div>
And when you restart the server you should see:

The Ember.js App
We can now add the ember-rails and ember-source gems for Ember assets and scaffolding to our Gemfile.
...
# JS framework for creating ambitious web applications.
gem 'ember-rails',  '~> 0.14.1'
gem 'ember-source', '~> 1.5.0'
And install the Ember assets with:
$ rails generate ember:bootstrap
We can also remove turbolinks as ember will handle all the routing after the first page load. Your application.js file
should look like this:
//= require jquery
//= require_tree .
I also renamed the generated app/assets/javascripts/application.js.coffee file to be
app/assets/javascripts/app.js.coffee to not conflict with the first application.js file.
Next move the html from home/index.html.erb and replace it with the following:
<% # Rendered Entirely in EmberJS. See app/assets/javascripts %>
Then we can move the html generation to ember by placing it in the top level application.hbs handlebars file.
<!-- app/assets/javascripts/templates/application.hbs -->
<div class='container'>
  <div class='jumbotron'>
    <h1>Hello from Ember.js!</h1>
    <p>The link to the home page is here</p>
  </div>
</div>
And the end of part one should be rendered by Ember looking like this:
You can now go on to part two and start building dynamic
tables!