Creating A Metrics Dashboard With Ember.js, Bootstrap, and Rails - Part 2
21 Apr 2014This is part two of a series on building a metrics dashboard with Ember, Bootstrap, and Rails. Over the next few weeks I will be building out more functionality and writing posts to cover that. If you haven’t read part one then that’s a good place to start. You can find part three here when you are finished.
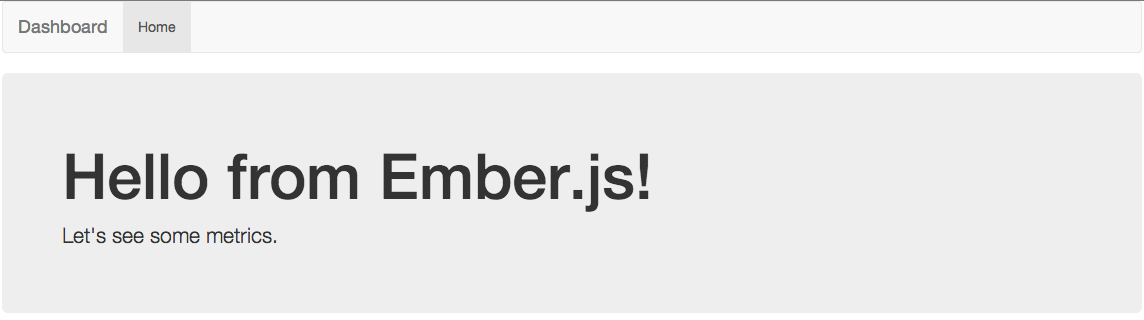
In part one we ended up with a Rails app that generated the Ember app that rendered our metrics page. If you followed along your page should now look like this:

Today we’re going to add some tables and see how data flows through an Ember app. If you are not familiar with Ember’s conventions and idioms you should first read their excellent documentation and guides before continuing here.
Remember, if you get stuck you can find all of the code for this post at github.com/jtescher/example-ember-rails-dashboard.
Preparing the application
Before we add any more content let’s update our Ember application template and add a basic structure with some
navigation in app/assets/javascripts/templates/application.hbs.
<div class='container'>

  <header class='masthead'>
    <nav class='navbar navbar-default' role='navigation'>
      <div class='container-fluid'>
        <div class='navbar-header'>
          <button type='button' class='navbar-toggle'
              data-toggle='collapse' data-target='#main-nav-collapse'>
            <span class='sr-only'>Toggle navigation</span>
            <span class='icon-bar'></span>
            <span class='icon-bar'></span>
            <span class='icon-bar'></span>
          </button>
          Dashboard
        </div>

        <div class='collapse navbar-collapse' id='main-nav-collapse'>
          <ul class='nav navbar-nav'>

              Home

          </ul>
        </div>
      </div>
    </nav>
  </header>

  <section class='main-content'>

  </section>

</div>
And let’s add an index template so we know when we’re on the home page in app/assets/javascripts/templates/index.hbs.
<div class='jumbotron'>
  <h1>Hello from Ember.js!</h1>
  <p>Let's see some metrics.</p>
</div>
If you reload the page you should now see this:
Creating Tables with Ember and Handlebars
Often the simplest way to display metrics data is to just put it all in a table. I find that it is often helpful when creating HTML with JavaScript to first start out with the final result and slowly add dynamic content in pieces. Let’s create an example of this to display some financial data about our sales process.
Step one is to create the Ember route to get to this URL. Let’s edit app/assets/javascripts/router.js.coffee and add it:
# app/assets/javascripts/router.js.coffee
Dashboard.Router.map ()->
  @resource('orders')
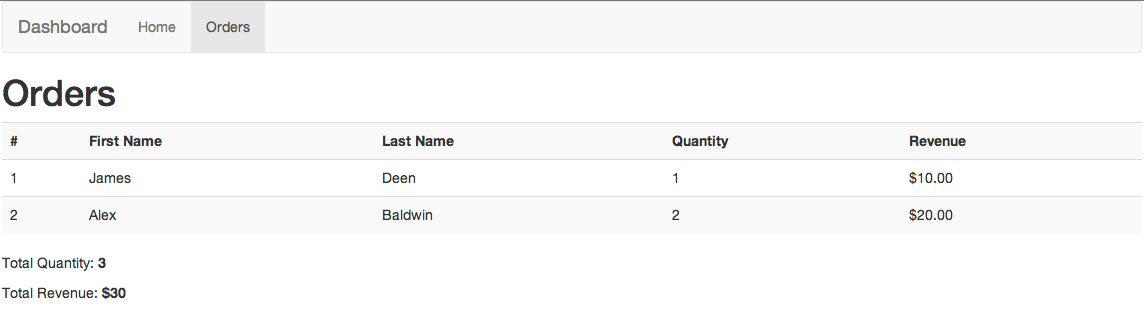
And we can then create an idea of what we want the page to look like by mocking up some static HTML in app/assets/javascripts/templates/orders.hbs
<h1>Orders</h1>
<table class='table table-striped'>
  <tr>
    <th>#</th>
    <th>First Name</th>
    <th>Last Name</th>
    <th>Quantity</th>
    <th>Revenue</th>
  </tr>
  <tr>
    <td>1</td>
    <td>James</td>
    <td>Deen</td>
    <td>1</td>
    <td>$10.00</td>
  </tr>
  <tr>
    <td>2</td>
    <td>Alex</td>
    <td>Baldwin</td>
    <td>2</td>
    <td>$20.00</td>
  </tr>
</table>

<p>Total Quantity: <b>3</b></p>
<p>Total Revenue: <b>$30</b></p>
Then we can add a link to this page in our application.hbs file (the double link-to is an annoying hack but
explained here):
...
<div class='collapse navbar-collapse' id='main-nav-collapse'>
  <ul class='nav navbar-nav'>

      Home


      Orders

  </ul>
</div>
...
Then if you reload and follow the orders nav link you should see this:
Creating Dynamic Tables
In Ember, a template typically retrieves information to display from a controller, and the controller is set up by its
route. Let’s make this table dynamic by assigning the data required to build it in the OrdersRoute.
# app/assets/javascripts/routes/orders_route.js.coffee
Dashboard.OrdersRoute = Ember.Route.extend({
  model: ->
    [
      {
        id: 1,
        firstName: 'James',
        lastName: 'Deen',
        quantity: 1,
        revenue: '10.00',
      },
      {
        id: 2,
        firstName: 'Alex',
        lastName: 'Baldwin',
        quantity: 2,
        revenue: '20.00',
      }
    ]
})
And then we set up the controller to process the totals in the OrdersController.
# app/assets/javascripts/controllers/orders_controller.js.coffee
Dashboard.OrdersController = Ember.ArrayController.extend({

  totalQuantity: (->
    @reduce(((previousValue, order) ->
      previousValue + order.quantity
    ), 0)
  ).property('@each')

  totalRevenue: (->
    @reduce(((previousValue, order) ->
      previousValue + parseFloat(order.revenue)
    ), 0)
  ).property('@each')

})
And this lets us use the data provided by the controller in the template:
<h1>Orders</h1>
<table class='table table-striped'>
  <tr>
    <th>#</th>
    <th>First Name</th>
    <th>Last Name</th>
    <th>Quantity</th>
    <th>Revenue</th>
  </tr>

  <tr>
    <td></td>
    <td></td>
    <td></td>
    <td></td>
    <td></td>
  </tr>

</table>

<p>Total Quantity: <b></b></p>
<p>Total Revenue: <b></b></p>
If you reload the page it should now look like this:
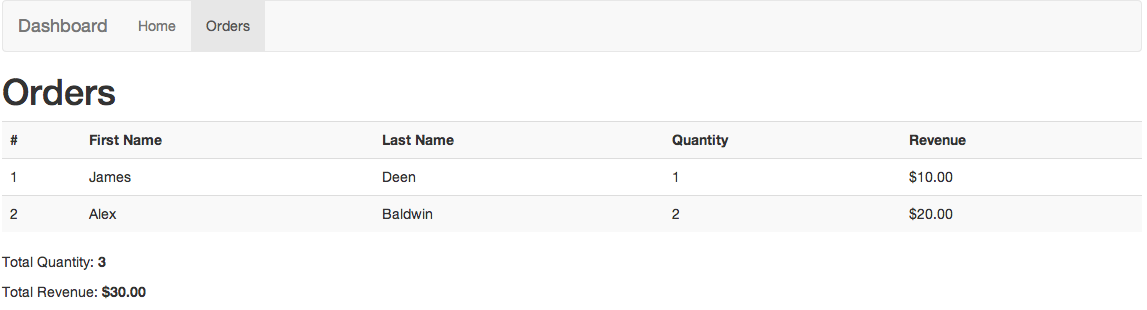
Formatting Values With Helpers
The image above looks pretty good but we seem to have lost our currency formatting. There are a few good libraries for formatting currencies in JavaScript, and Ember makes it simple to access these libraries in your handlebars templates. Let’s add the accounting.js library to format our revenue numbers.
First install the library to vendor/assets/javascripts:
$ curl https://raw.github.com/josscrowcroft/accounting.js/master/accounting.js -o vendor/assets/javascripts/accounting-0.3.2.js
Then include it in your application.js file:
//= require jquery
//= require accounting-0.3.2
//= require_tree .
Then create a currency_helpers.js.coffee file to wrap the library.
# app/assets/javascripts/helpers/currency_helpers.js.coffee
Ember.Handlebars.registerBoundHelper('numberToCurrency', (number) ->
  accounting.formatMoney(number)
)
And finally we can use this helper in our orders.hbs view:
...

  <tr>
    <td></td>
    <td></td>
    <td></td>
    <td></td>
    <td></td>
  </tr>

</table>

<p>Total Quantity: <b></b></p>
<p>Total Revenue: <b></b></p>
Now that our numbers are formatted properly you can reload the page and see our final result for part 2:
You can now go on to part three and start adding some charts!